How to Install Printer on Ubuntu Server: A Step-by-Step Guide
Are you trying to install a printer on your Ubuntu server? Installing a printer on Ubuntu can seem daunting at first, but it is a straightforward process once you understand the underlying concepts.
Understanding CUPS and Printer Installation on Ubuntu
CUPS (Common UNIX Printing System) is the standard printing system for Linux and macOS, providing a powerful and flexible solution for managing printers across your network. To install a printer on Ubuntu server, you'll need to use CUPS.
To install CUPS on Ubuntu server, you can use the apt package manager. Run the following command in your terminal:
sudo apt update && sudo apt install cups
Step 2: Add User Account for CUPS
To manage printers with CUPS, you'll need to add a user account. Create a new user account by running the following command:
sudo adduser [username] printadmin
.jpg)
Replace [username] with the desired username.
Step 3: Install Printer Driver
Depending on the printer model, you may need to install a printer driver. You can find the printer driver for your printer model on the manufacturer's website. Download and install the driver by following these steps:
- Download the printer driver from the manufacturer's website.
- Extract the driver package.
- Run the installer as an administrator.
- Follow the installation prompts to complete the installation.
Step 4: Add Printer to CUPS
To add a printer to CUPS, follow these steps:
- Open the CUPS web interface by navigating to
http://localhost:631in your web browser. - Login with the username and password you created earlier.
- Click on the "Add Printer" button.
- Select the printer model and driver from the list of available options.
- Configure the printer settings as needed.
Step 5: Test the Printer
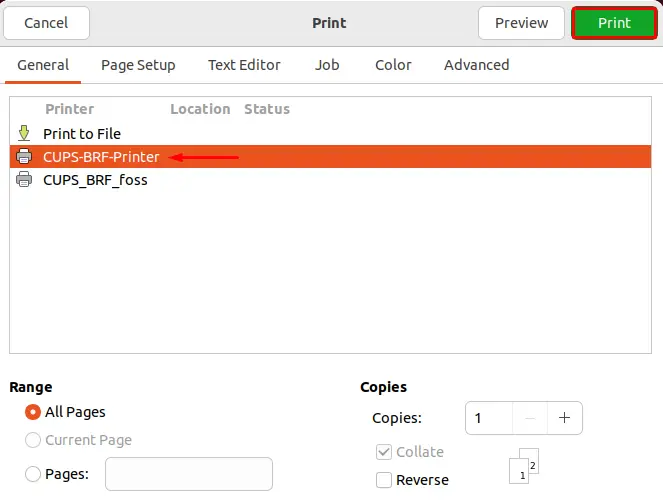
Furthermore, visual representations like the one above help us fully grasp the concept of How To Install Printer On Ubuntu Server.
After adding the printer to CUPS, test the printer to ensure it's working properly. You can print a test page to test the printer's functionality.
Conclusion
Installing a printer on Ubuntu server can seem daunting, but it's a straightforward process once you understand the underlying concepts. By following these steps, you'll be able to install a printer on your Ubuntu server and manage it with CUPS.
Common Issues and Solutions
If you encounter any issues during the installation process, refer to the following common issues and solutions:
- Issue: The printer is not recognized by the system.
- Solution: Ensure the printer driver is installed correctly and the printer is connected to the system.
- Issue: The printer is not printing properly.
- Solution: Check the printer settings and ensure the correct paper size and orientation are selected.
Best Practices for Printer Installation on Ubuntu Server
To ensure smooth printer installation and management on Ubuntu server, follow these best practices:


![Image showcasing Install and Configure Samba Share on Windows 11 [Guide]](https://itomation.ca/wp-content/uploads/2024/01/Install-Ubuntu-Server-Install-Type-768x548.png "Install and Configure Samba Share on Windows 11 [Guide]")


 - System76 Support")
")


