How to Set Up a Chromebook: A Step-by-Step Guide
Setting up a Chromebook is a straightforward process that can be completed in a few minutes. In this article, we will walk you through the steps to set up your new Chromebook and get started with using it.
Step 1: Turn On Your Chromebook
Before you start setting up your Chromebook, ensure that the device is turned on. If the battery is detached, install the battery and then press the power button. Your Chromebook should now be turned on and ready for setup.
Step 2: Follow the On-Screen Instructions
Once your Chromebook is turned on, you will see the setup screen. This screen will guide you through the process of setting up your device. To choose your language and keyboard settings, select the language that appears on the screen. This will ensure that your Chromebook is set up to your preferences.
Step 3: Connect to Wi-Fi
Next, connect your Chromebook to your Wi-Fi network. Select the network from the list of available networks and enter the password. This will ensure that your Chromebook is connected to the internet and can sync with your Google account.
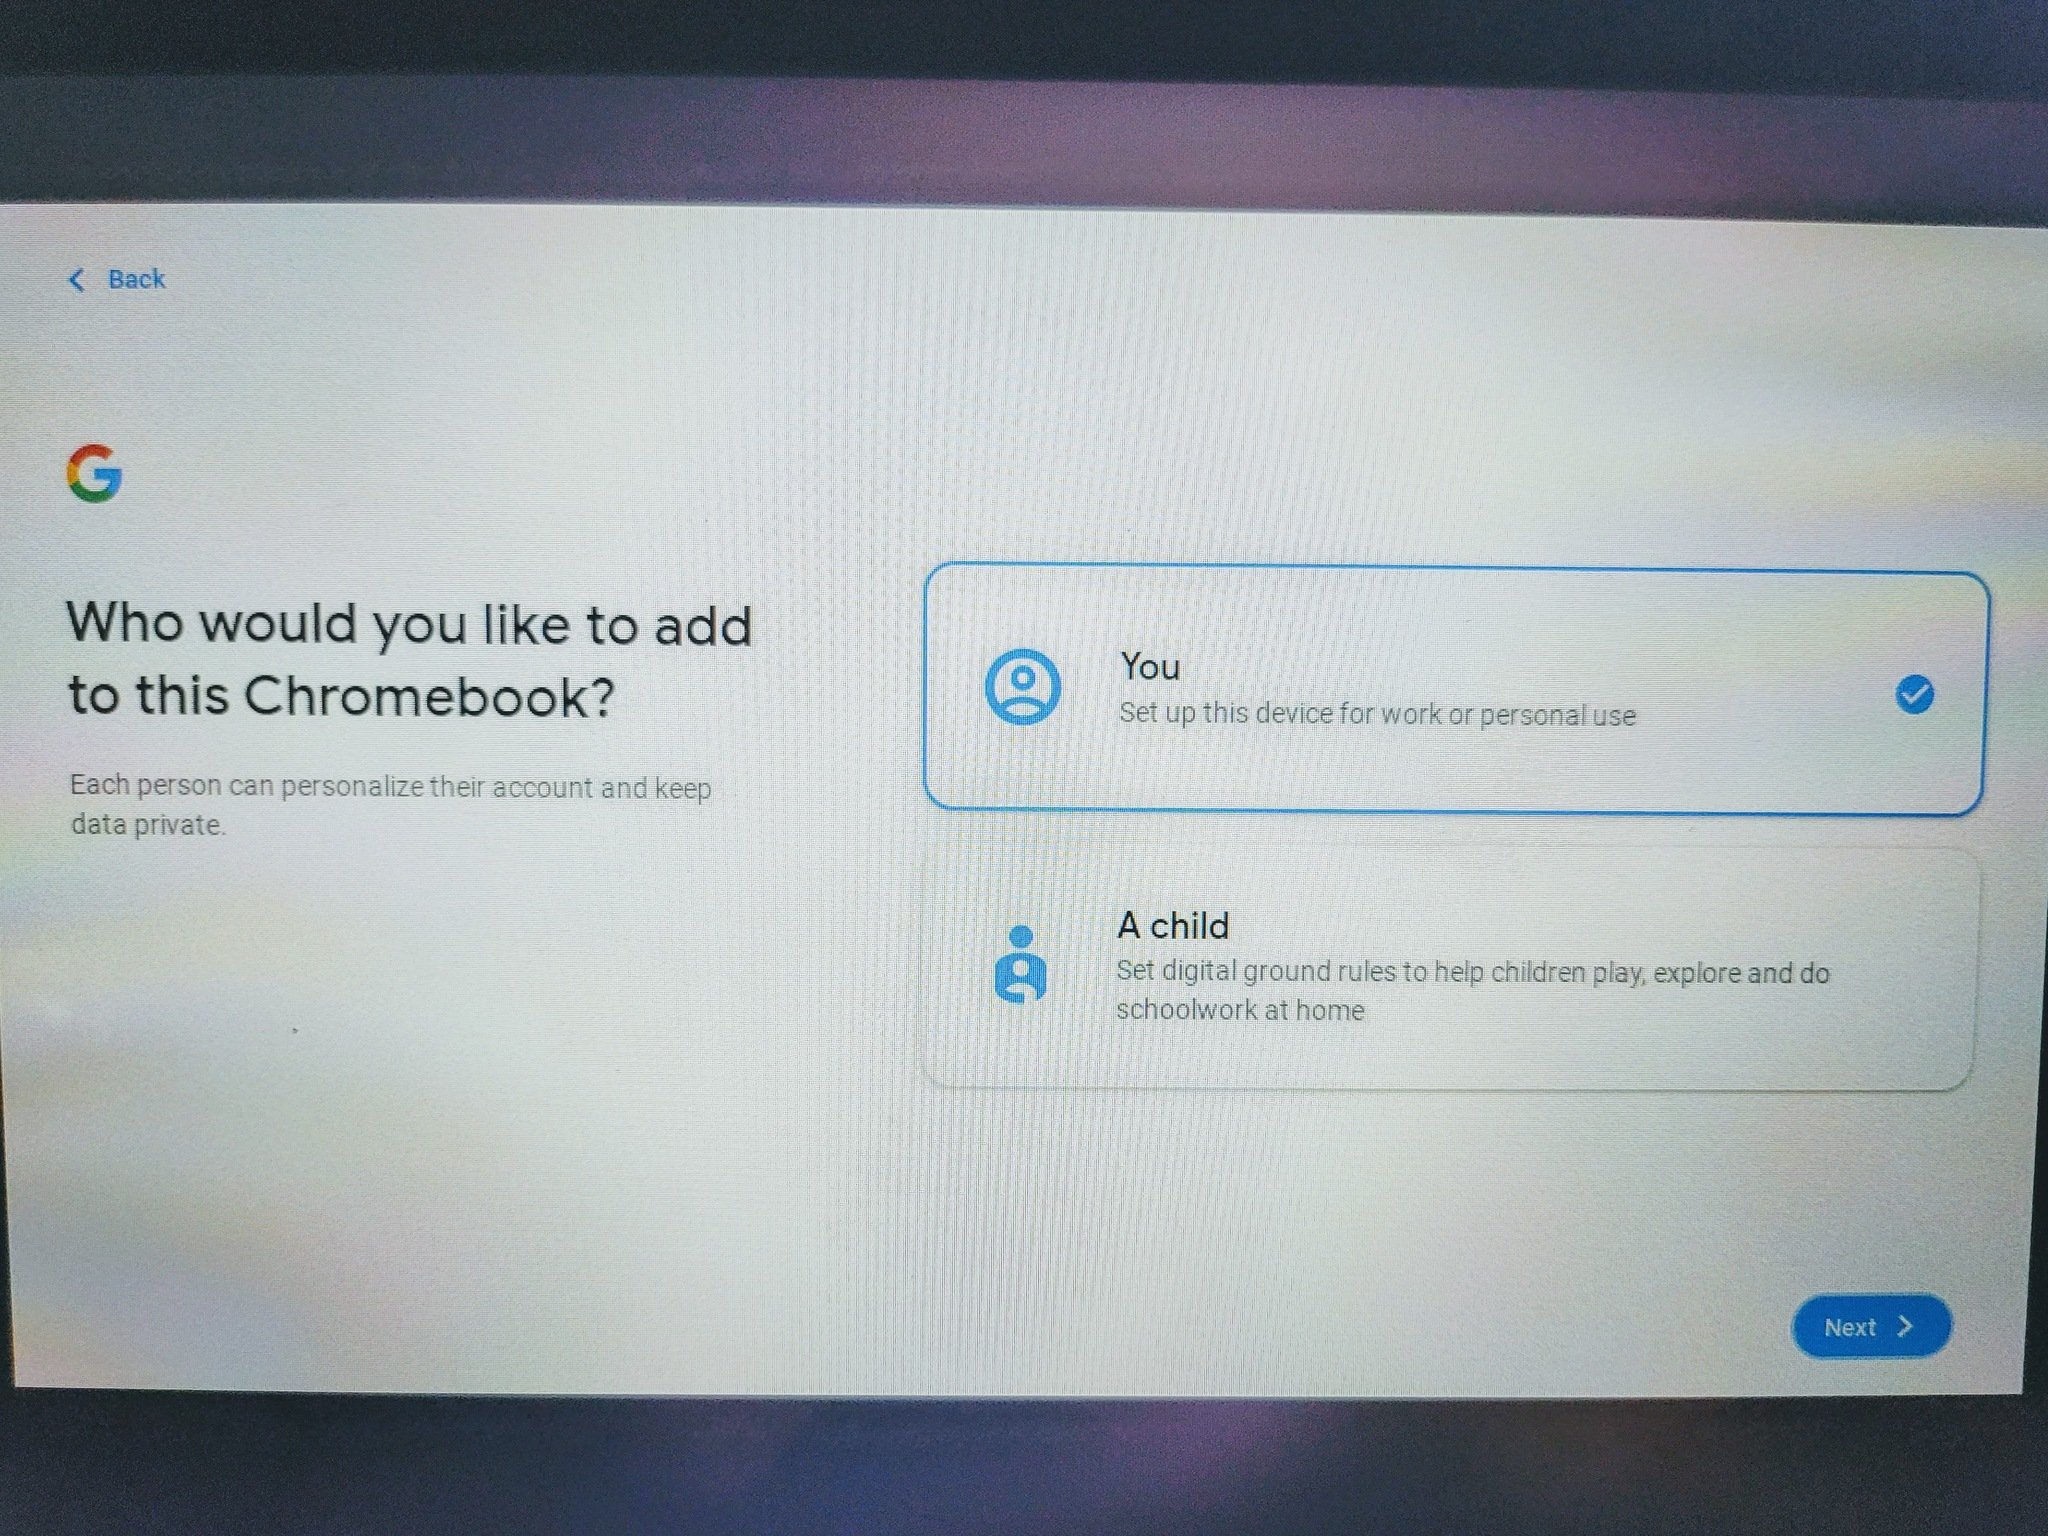
Now that your Chromebook is connected to the internet, sign in to your Google account. If you don't have a Google account, create one now. This will ensure that you can sync your data across all your devices and access your Google Drive and Google Photos.
Step 5: Set Up Your Google Drive
After signing in to your Google account, you will be prompted to set up your Google Drive. This will allow you to store your files and access them from anywhere. Select the amount of storage space you want and create a password to protect your files.
Step 6: Set Up Your Google Photos
Step 7: Set Up Your Chromebook's Security
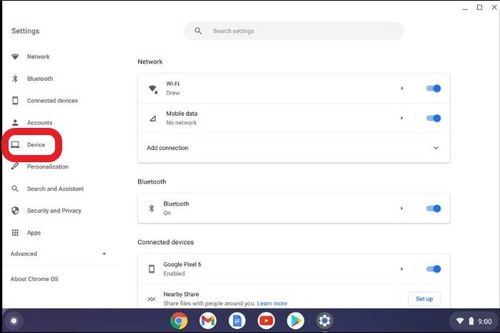
Now that your Chromebook is set up, you need to set up its security. Go to the Settings app and select "Security and updates." Here, you can enable 2-step verification, set up a recovery phone, and enable the Chromebook's built-in virus scanner.
Step 8: Set Up Your Chromebook's Extensions
Next, set up your Chromebook's extensions. These are small pieces of software that can enhance your browsing experience. Go to the Chrome Web Store and select the extensions you want to install.
Step 9: Set Up Your Chromebook's Themes
Finally, set up your Chromebook's themes. This will allow you to customize the appearance of your device. Go to the Settings app and select "Appearance." Here, you can select from a range of themes and customize your Chromebook's look and feel.
Setting Up a Chromebook for Business Use
Setting up a Chromebook for business use is similar to setting up a Chromebook for personal use. However, you may need to set up a work account and configure your device for business use. Here are the steps to follow:
- Sign in to your work account using a Google account or a work-provided account.
- Select the "Work account" option from the login screen.
- Follow the on-screen instructions to set up your work account.
- Configure your device for business use, including setting up a work VPN and configuring any business-specific settings.
Tips for Setting Up a Chromebook
Here are some tips for setting up a Chromebook:
Conclusion
Setting up a Chromebook is a straightforward process that can be completed in a few minutes. By following the steps outlined in this article, you can set up your Chromebook and get started with using it. Whether you're setting up a Chromebook for personal or business use, these tips and instructions will help you get started and ensure that your device is set up properly.


 - HP")


:max_bytes(150000):strip_icc()/002_modify-display-and-mirroring-settings-on-chromebook-4103595-3ffb9b9243b54686b939461234a4d329.jpg "How to Disable a Pop-Up Blocker: Geek Squad - Best Buy")


")


