Charging Port Repair Kit for Beginners: A Step-by-Step Guide
Are you tired of dealing with a faulty charging port on your smartphone or laptop? Do you want to learn how to fix it like a pro without breaking the bank? Look no further! In this article, we will provide you with a comprehensive guide on how to repair a charging port using a charging port repair kit for beginners.
Why Do Charging Ports Fail?
Charging ports can fail due to various reasons, including wear and tear, dirt, dust, and corrosion. When a charging port fails, it can lead to a range of issues, including slow charging, won't charge, or even device malfunction. In this guide, we will walk you through the process of diagnosing and repairing a faulty charging port using a charging port repair kit for beginners.
What is a Charging Port Repair Kit for Beginners?
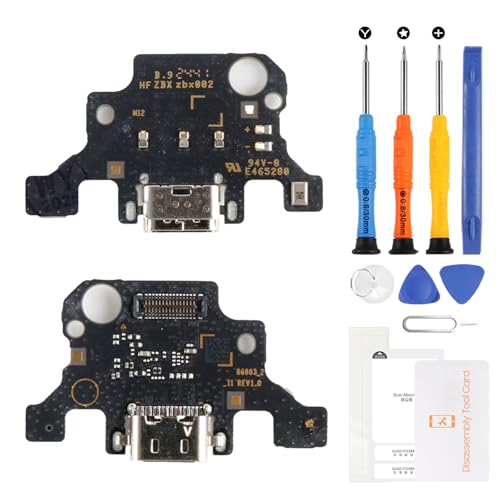
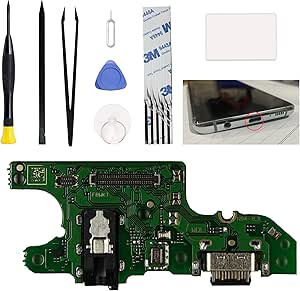
A charging port repair kit for beginners is a comprehensive kit that includes all the tools and materials needed to repair a faulty charging port. The kit usually includes precision screwdrivers, pry tools, tweezers, suction cups, and adhesive tapes designed for handling delicate mobile components. Some kits may also include a digital multimeter to test voltage, current, and resistance.
Tools and Materials Needed
Before you start the repair process, make sure you have the following tools and materials:
- Charging port repair kit for beginners
- Precision screwdrivers
- Pry tools
- Tweezers
- Suction cups
- Adhesive tapes
- Digital multimeter (optional)
Step-by-Step Guide to Repairing a Charging Port
Repairing a charging port can be a complex process, but with the right tools and a bit of patience, you can do it yourself. Here's a step-by-step guide to help you repair a charging port using a charging port repair kit for beginners:
Step 1: Prepare the Workspace and Gather Equipment
Before attempting to repair the charging port, try to diagnose the problem by identifying the symptoms. Is your device not charging? Is it charging slowly? Is it not recognizing the cable? Once you've identified the problem, you can proceed with the repair process.
Step 3: Clean the Charging Port
Before you start disassembling the device, make sure to clean the charging port thoroughly using a cleaning brush or a cotton swab. Remove any dirt, dust, or debris that may be causing the problem.
Step 4: Remove the Cable and Screws
Using your precision screwdrivers and pry tools, carefully remove the screws and cables holding the charging port in place. Be careful not to damage any surrounding components.
Step 5: Inspect and Clean the Charging Port
Step 6: Replace the Charging Port
As we can see from the illustration, Charging Port Repair Kit For Beginners has many fascinating aspects to explore.
Using your charger port repair kit for beginners, replace the faulty charging port with a new one. Make sure to follow the instructions provided with the kit carefully.
Step 7: Assemble and Test the Device
Conclusion
Repairing a charging port can seem like a daunting task, but with a charging port repair kit for beginners, you can do it yourself. Remember to be patient and take your time, as repairing a charging port requires precision and care. By following the steps outlined in this guide, you can fix your faulty charging port and get your device back to its former functionality.
Final Tips and Reminders
Before you start the repair process, make sure to:
- Read the instructions carefully
- Use the right tools and materials
- Be patient and take your time
- Test the device thoroughly after repair
By following these steps and tips, you can successfully repair your charging port and get your device back to full functionality. Remember to be careful and precise when handling delicate components, and don't hesitate to seek professional help if you're unsure or uncomfortable with any part of the process.


