G Wireless Router Setup Tutorial: A Step-by-Step Guide
Are you struggling to set up your G wireless router? Don't worry, you're not alone. Setting up a wireless router can be a daunting task, especially for those who are new to networking. However, with the right guidance, you can easily set up your G wireless router and enjoy a fast and reliable internet connection. In this tutorial, we'll take you through the step-by-step process of setting up your G wireless router. We'll cover the basics of networking, how to configure your router's settings, and provide tips on how to optimize your wireless network for better performance.Step 1: Unboxing and Hardware Installation
Before you start setting up your G wireless router, make sure you have the following hardware components: * G wireless router * Power adapter * Ethernet cable * WiFi antenna (optional) Unbox your router and connect the power adapter to the router's power port. Plug in the power adapter to a nearby power outlet and turn on the router.Step 2: Accessing the Router's Web Interface

Furthermore, visual representations like the one above help us fully grasp the concept of G Wireless Router Setup Tutorial.
To access the router's web interface, you'll need to connect to the router using a computer or mobile device. You can use an Ethernet cable to connect to the router or use the WiFi network to connect wirelessly. Open a web browser and type the router's IP address in the address bar. The default IP address for most routers is 192.168.0.1 or 192.168.1.1. Log in to the router using the default username and password, which are usually printed on the underside of the router or in the user manual.Step 3: Configuring the Router's Settings
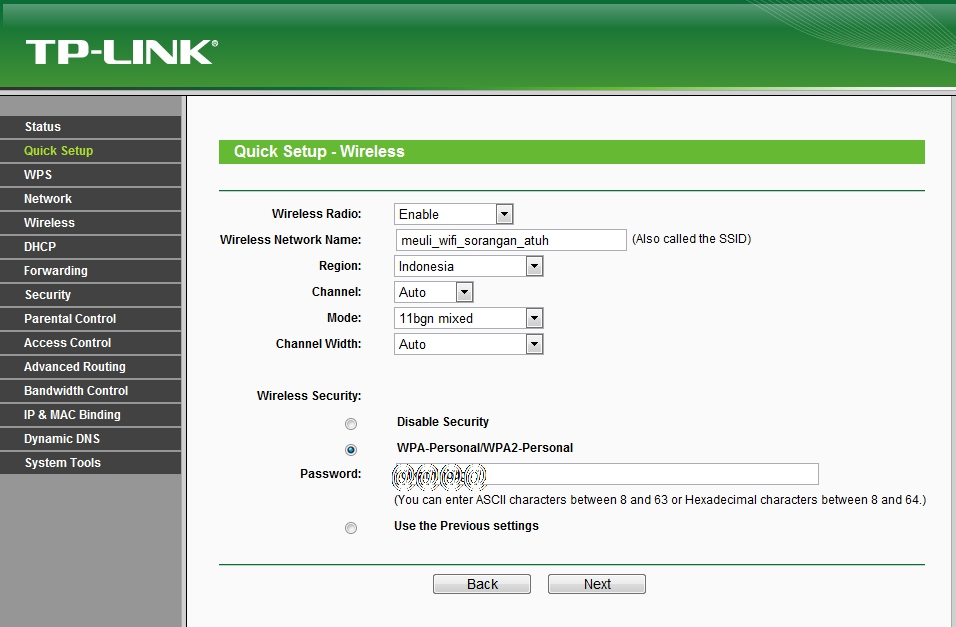
Once you've logged in to the router's web interface, you'll need to configure the router's settings. This includes setting up the wireless network, configuring the network settings, and setting up the router's security features. * **Wireless Network Settings:** Configure the wireless network settings, including the SSID (network name), channel, and security settings (WEP, WPA, or WPA2). * **Network Settings:** Configure the network settings, including the IP address, subnet mask, and default gateway. * **Security Features:** Set up the router's security features, including firewall settings, antivirus software, and intrusion detection.Step 4: Optimizing the Wireless Network
This particular example perfectly highlights why G Wireless Router Setup Tutorial is so captivating.
Once you've configured the router's settings, you'll need to optimize the wireless network for better performance. This includes: * **Channel Selection:** Choose the best channel for your wireless network to minimize interference from neighboring networks. * **WiFi Antenna Placement:** Place the WiFi antenna in a central location to ensure the best coverage. * **Router Placement:** Place the router in a central location to ensure the best coverage. * **WiFi Network Name:** Choose a unique and descriptive network name to avoid confusion with neighboring networks. Setting up a G wireless router can be a complex task, but with this tutorial, you should be able to easily set up your router and enjoy a fast and reliable internet connection. Remember to configure the router's settings carefully, optimize the wireless network, and ensure the router is placed in a central location for the best coverage.

 Router Setup for Beginners")

 | T-Mobile Support")


.png "PDFWireless-G Broadband Router - Linksys")


 - HP")


 | T-Mobile 5G Home Internet")
![[Wireless Router] How to set up ASUS WiFi router via ASUS Router App ... - G Wireless Router Setup Tutorial](https://i.ytimg.com/vi/glqZFfUd3Wk/maxresdefault.jpg "[Wireless Router] How to set up ASUS WiFi router via ASUS Router App ...")


