Ugrading Your HP Laptop: A Step-by-Step Guide to Replacing the Hard Drive
Are you struggling with a slow HP laptop or running out of storage space? It might be time to upgrade your old hard drive with a new one. In this article, we'll guide you through the process of replacing the hard drive in your HP laptop, step by step.
The Benefits of Replacing the Hard Drive
- Improved Performance: A new hard drive can significantly boost your laptop's performance and speed.
- No Data Loss: With the right guide and tools, you can replace your hard drive without losing any data.
Choosing the Right Hard Drive

This particular example perfectly highlights why Hp Laptop Hard Drive Replacement is so captivating.
When it comes to replacing the hard drive, you have several options to consider. Here are a few things to keep in mind:
- Hard Disk Drive (HDD): A traditional spinning hard drive provides ample storage space but can be slow.
- Solid-State Drive (SSD): A faster and more reliable option that's ideal for laptops.
- Hybrid Drive (HHDD): A combination of a hard drive and SSD that offers a balance between speed and storage space.
Tools and Materials Needed
Before you start the replacement process, make sure you have the following tools and materials:
- Phillips screwdriver
- Torx screwdriver
- SATA cable
- SATA power cable
- New hard drive
Replace the hard drive in your HP laptop in the following steps:
- Shut Down Your Laptop: Make sure your laptop is turned off before starting the process.
- Remove the Battery: Take out the battery from the laptop.
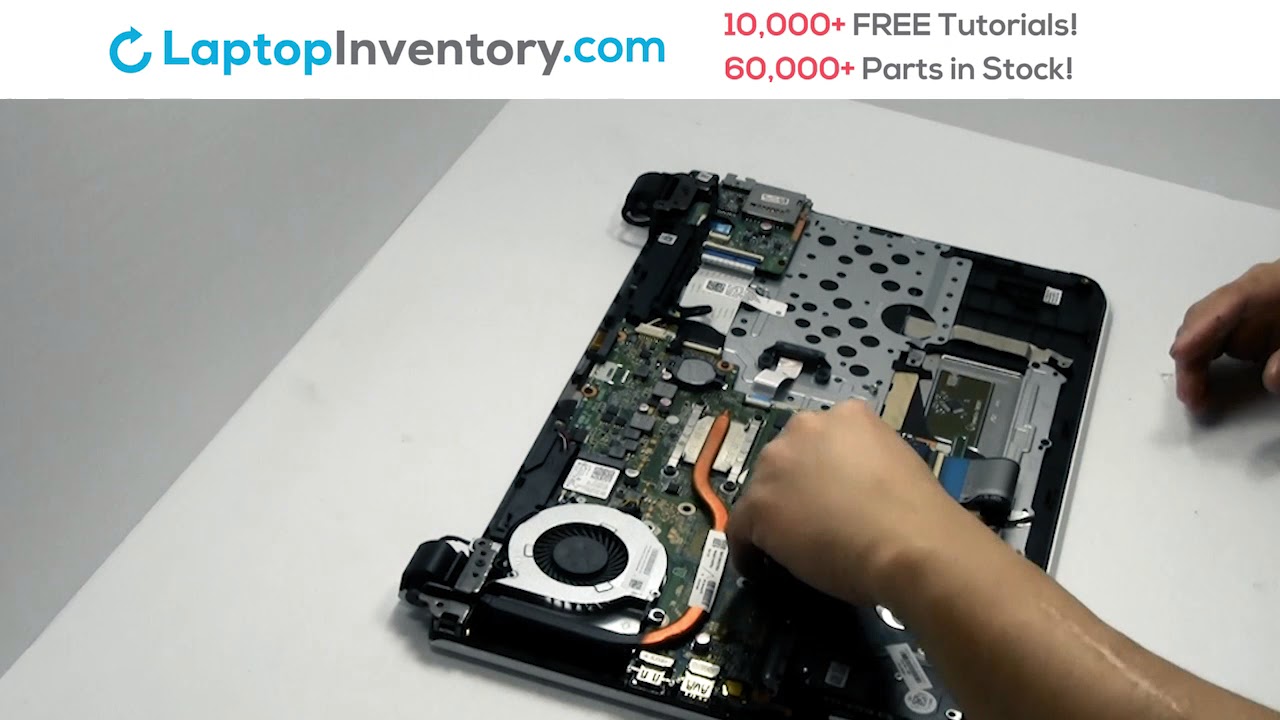
- Locate the Hard Drive: Find the hard drive on the bottom or side of the laptop.
- Disconnect the SATA Cables: Use a Phillips screwdriver to remove the screws and disconnect the SATA cables.
- Remove the Hard Drive Bracket: Use a Torx screwdriver to remove the screws holding the hard drive bracket in place.
- Remove the Old Hard Drive: Gently pry the old hard drive out of its bracket.
- Install the New Hard Drive: Insert the new hard drive into the bracket and secure it with the Torx screws.
- Reconnect the SATA Cables: Connect the SATA cables back to the new hard drive.
- Replace the Hard Drive Bracket: Put the hard drive bracket back in place and secure it with the Torx screws.
- Reassemble the Laptop: Put everything back together in the reverse order you disassembled it.
- Reinstall the Operating System: Install the operating system on the new hard drive.
Reliable Replacement Options
Such details provide a deeper understanding and appreciation for Hp Laptop Hard Drive Replacement.
When it's time to replace your HP laptop's hard drive, look to the following reliable options:
- HP Hard Drive Replacement Parts
- Compatible Replacement Hard Drives
- Upgraded Hard Drive Solutions
Conclusion
Replacing the hard drive in your HP laptop is a straightforward process that can significantly improve your laptop's performance. By choosing the right hard drive and following the steps outlined in this guide, you can ensure a smooth transition with minimal data loss.
For more information on HP laptop hard drive replacement, check out the following resources:
- HP's Official Support Website
- Laptop Mag's Best Laptops in 2025
- Best Buy's Hard Drive Options
- Staples' Hard Drive Selection

 Hard Drive Replacement Laptop Parts")


 - Wittytool")


